If you’re planning to restore your timber floors on the Gold Coast, it’s important to have a clear idea of how long the process will take from start to finish. While most floor sanding projects involve 2 to 4 days of on-site work, the total timeline can vary depending on several factors, including the condition of the timber, the size of the area, and the type of finish used. Drying and curing times also play a role, especially in humid conditions such as your typical Gold Coast Summer. In the breakdown below, we outline each stage of the timber floor restoration process to help you understand what’s involved and how long each step typically takes.
Step-by-Step Timeline Breakdown
Step 1: Initial Consultation or Site Visit (30 minutes)
Every floor sanding project starts with a consultation, either over the phone with photos of the floors or onsite in person. During this visit, we assess the condition of your timber floors, discuss your desired finish, and talk through your goals and timeline. This step allows us to tailor the project to your specific needs and schedule the job at the right time, taking into account things like the weather, drying conditions, and any upcoming events or renovations in your home.

Step 2: Pre-Project Preparation (2 to 4 hours)
Before sanding begins, the area needs to be cleaned and prepped to ensure a smooth job. This includes removing all furniture, rugs, and personal items from the space. We’ll also check for and remove any staples, nails, or tacks left behind from previous floor coverings, and make small adjustments to doors and trims if needed.
To help contain dust, adjacent areas may be sealed off with plastic sheeting. We suggest most homeowners move their personal belongings themselves, while we can handle tasks like removing staples or remnants from previous floor coverings. You can check out our blog post on preparing your home before floor sanding for more information.
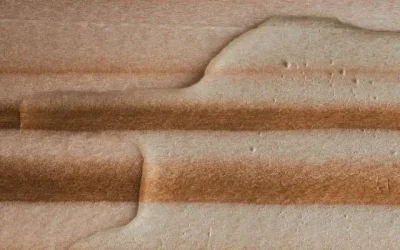
Step 3: Sanding the Floors (3 hours to 2 days)
This is where the transformation truly begins. Using a professional floor sanding machines, we start with a coarse grit to remove old coatings, surface damage, and level out uneven floor boards. Next, we complete an intermediate pass with medium-grade sandpaper to smooth the floor, followed by a fine sanding pass to create a clean and even surface ready for coating.
The time this step takes depends on the size of your floors and their current condition. A standard 3-bedroom home may take a day, while older floors with heavy damage, adhesive, or previous carpet staples may take longer to prepare properly. If you’re sanding multiple rooms or dealing with tricky floor conditions, this stage can extend to another full day.
Step 4: Cleaning Between Stages (1 to 4 hours)
Dust control is critical to achieving a smooth, professional finish. Between each stage, especially before applying any coatings, we thoroughly vacuum the floor and wipe down skirting boards, corners, and edges. This prevents fine dust particles from settling into the finish and ensures proper adhesion between coats. While it doesn’t take long, this step is repeated multiple times throughout the project to maintain a clean work surface. Skipping it can compromise the final result, which is why it’s an essential part of the sanding process.

Step 5: Gap Filling (Optional: Adds 4 to 24 hours)
If your timber floors have visible gaps or cracks between boards, gap filling may be recommended to improve the final appearance and reduce draughts or dust collection. This involves applying either a flexible filler or a sawdust-resin mix to close the gaps, depending on the size and movement of the timber.
Once applied, the filler needs time to dry completely before final sanding and coating can take place. In some homes, this adds just a few extra hours, but for floors with widespread gaps, it can delay the project by up to a full day. While optional, gap filling can make a big difference in both appearance and long-term maintenance.
Step 6: Applying the Finish (1 to 4 hours per coat + drying time)
Once the floor is fully prepped, it’s time to apply the protective finish. Most timber floors receive two to three coats, with each one taking about 1 to 4 hours to apply, depending on the size and space of the floor. The type of finish you choose has a big impact on the overall drying time. Water-based finishes typically dry within 2 to 4 hours between coats, making them a faster option. On the other hand, solvent-based products require more time, usually between 8 and 24 hours between coats. Drying speed also depends on the ambient temperature and humidity levels. Intergrain offers a range of timber floor coatings suited to Australian conditions, each with its own drying profile and finish type.

Step 7: Final Drying and Curing
After the final coat is applied, it’s important to give your floors time to dry and cure properly. Most finishes are safe for light traffic after 24 to 48 hours. Furniture can usually be returned after 3 to 5 days, but it’s best to place pads under the legs and avoid dragging anything across the surface.
For full curing, allow 1 to 2 weeks, depending on the finish type and weather conditions. During this time, the floor may look dry, but it’s still hardening underneath. Taking care during this final stage protects the new finish and ensures a longer-lasting result.
What Can Affect the Timeline?
While most floor sanding projects follow a predictable schedule, several factors can influence how long the job takes from start to finish:

- Floor layout. A compact single-room job may wrap up quickly, while larger homes with hallways, staircases, or multiple rooms require more time to sand and coat properly.
- Floor condition. Floors that are stained, water-damaged, uneven, or covered in old coatings or carpet glue often need extra passes with the sander. Repairs or levelling may also be required before coating can begin.
- Type of finish. Water-based coatings are quicker to dry, usually 2 to 4 hours between coats, while solvent-based finishes can require up to 24 hours between applications, extending the timeline by one or more days.
- Humidity and weather. On the Gold Coast, high humidity can slow down drying and curing times, especially in summer. Good ventilation and controlled indoor climate can help reduce delays.
- Optional extras. Adding services like gap filling, staining, or applying a third coat of finish will extend the job duration, but also improve the look and longevity of your floors.
Being aware of these variables allows for better planning, especially if you’re working within a tight schedule or preparing your home for an event or a move-in date.
Tips to Keep Your Project on Track
A little preparation goes a long way toward avoiding delays during your floor sanding project. Here are a few simple ways to help things run smoothly.
- Clear the space in advance. Remove all furniture, rugs, and personal items before the team arrives. This ensures sanding can begin without interruptions. Here are some quick dos and don’ts for moving furniture on timber floors.
- Choose your finish and stain early. Deciding on the coating product and colour ahead of time avoids last-minute changes and keeps the schedule on track.
- Plan for downtime. During coating and curing, floors can’t be walked on or used. If possible, arrange alternative accommodation or avoid scheduling other work in the area.
- Account for weather. Drying and curing can take longer during humid or rainy day periods, so allow some buffer time if you’re booking during summer.
- Communicate any deadlines. If you’re working to a deadline such as finishing before guests arrive or renovations continue, let your floor sander know. They may be able to recommend a quicker drying system or adjust the schedule to suit.
Final Thoughts
For most Gold Coast homes, a professional floor sanding project takes around 2 to 4 days of hands-on work, with extra time needed for drying, curing, and safely returning furniture. The exact timing depends on your floor’s condition, the products used, and the local climate, especially during Gold Coast’s humid months. Planning ahead, making decisions early, and allowing time for each stage to be done properly will help you get the best result with minimal disruption.
Looking for a professional to do the job? We provide floor sanding services in Ashmore, Labrador and throughout the Gold Coast. Contact us today for a personalised assessment and a clear, customised quote. Let’s get your timber floors looking their best again.